
How to Use a Hytera Two-Way Radio: Programming, Channels, and Everyday Use
, by Jesus Moraga, 8 min reading time
, by Jesus Moraga, 8 min reading time
Hytera is a leading manufacturer of two-way radios, providing digital and analog communications for various settings with advanced features including GPS and PoC (Push-to-Talk over Cellular) coverage.
Hytera’s range of professional communication solutions is considered the go-to for numerous commercial and industrial users and for public safety groups. It offers reliable radio transmission for large professional groups right through to individuals.
This quick guide covers how to program your Hytera radio and best practices for daily use.
Hytera two-way radios allow for instant voice communication without relying on cellular networks or Wi-Fi, so there’s no waiting for signal, dialing, or connection issues. These radios operate through radio frequencies.
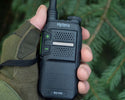
Two-way radios have a simple Push-to-Talk (PTT) button enabling communication. Press and hold the button to speak and then release it to listen.
On your radio’s menu, you’ll find “Audio Settings” or “Sound Configuration”, which cover 3 main categories of sound. Receive audio is what you hear from others, and transmit audio is what you send to other users.
You’ll need to adjust the volume to a comfortable setting for your environment.
Two-way radios have programmable channels, too, and most operate on multiple channels. You must be on the same channel for effective communication.
The device will also have a USB charger or charging dock. It’s vital to follow the correct battery charging protocol for your radio in line with the manufacturer’s instructions.
On any given channel, radios must be operating in the same mode to communicate — a strictly analog radio can't talk to a strictly digital one.
That said, many Hytera DMR radios, including flagship models like the BD502i, support dual mode, letting them communicate with both analog and digital units depending on the channel they're set to. Either way, all radios in a conversation need to share the same technical settings.
Analog radios transmit voice using continuous frequency modulation (FM) over a carrier wave. They are simple to use and affordable. However, analog radios are more susceptible to degradation over distance, interference, and static.
Digital radios take voice communication and convert it into binary data packets, compressing it before transmission.
Digital signals are clearer and more consistent until the connection is lost. They’re more efficient, plus they support advanced features like text messaging, noise cancellation software, and GPS tracking. However, the initial cost is higher than that of analog radios.
It’s easier than you think! You’ll need to download Hytera radio programming software available on our website. Choose a version that’s compatible with your computer. After downloading is complete, launch the installer.
Power your Hytera radio and opt for programming mode. Connect the radio to the computer using either a wireless programming adapter or a programming cable; this will depend on your radio model.
Launch the software, which will automatically find your radio and connect with it.
Once connection is established, the programming software will configure the channels and settings. You can amend channel names to suit your needs.
Save the settings and configurations in the Hytera software, verify them, and transfer them to the radio.
Your radio must remain connected and in programming mode throughout this process for it to be successful.
The alternative to software programming is manual programming if your radio supports it.
Power on the radio and check the volume level. Enter programming mode by pressing a specific combination of buttons — your user manual will inform you.
Using the navigation keys, select a channel. Input the chosen frequencies for receiving and transmitting, plus the settings and any privacy codes. Save these settings and then repeat the process for additional channels.
Always test communication with another radio user before you head off into the field.
Ensure your radio is charged and that the battery is properly inserted and healthy with plenty of capacity.
Press and hold the power button to turn on. Select the correct channel and then press the PTT button to start transmitting. Release the button when you have finished your message.
Be clear and concise in your communication and follow proper etiquette, so that people understand when you have finished your message or closed a conversation.
Ask for help if you’re a new user, you’re stepping up to software programming for the first time, or you’re encountering technical problems. Programming a new unit to an existing radio system can also present some challenges.
Another good reason for professional help is if you’re unsure about licensing compliance or if you need a two-way radio license. In the US, you need a radio license to transmit on certain frequencies.
Most commercial Hytera users transmit on business and land mobile radio frequencies, so you’ll need a license from the Federal Communications Commission (FCC) under Part 90 of its rules. The license covers your organization and the specific frequencies you're authorized to use. You must also understand and comply with FCC regulations.
It’s always best to talk to a professional to ensure a safe and compliant set-up, so you know you can rely on reliable radio operation when it counts.
Hytera radios are available in analog and digital modes. Hytera digital DMR (Digital Mobile Radio) radios operate in both digital and analog modes, allowing you to transition seamlessly from analog to digital with all the extra features digital technology provides. Digital provides better audio quality, enhanced privacy, and increased call capacity.
Depending on the model, you’ll either use the Smart Channel Selector knob, menu-based selection, or pre-programmed channel keys. The Smart Channel Selector knob can switch between analog and digital channels if the zone has both. Many Hytera models have channel up/down keys, and some support zone up/down keys to flick between groups of channels if your radio has multiple zones.
Hytera provides two-way radio solutions for all users and situations. You can choose the level of features you want and mix digital and analog modes for seamless and effective communications.
At Atlantic Radio Corp, there's always help on hand. We offer advice on different Hytera radios for every level of user, support products like boosters, and provide guidance on programming and troubleshooting.
Explore our range of Hytera two-way radios and accessories and tailor a package that works for your everyday communication needs.


