
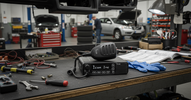
Tips for Mounting and Installing Icom Mobile Radios
, by Jesus Moraga, 6 min reading time
, by Jesus Moraga, 6 min reading time
The process of properly installing a mobile radio in a vehicle has some hidden complexities. Getting it right the first time keeps your Icom radio performing flawlessly, providing the crystal-clear audio and dependable connection your operations demand. Equip your staff with communication devices and systems that never fail, boosting efficiency and safety across the board. Use these tips for mounting and installing Icom mobile radios into fleet vehicles for industries such as security, delivery, and safety.
Before you even pick up a tool, your first step is to thoroughly review the user manual included with your Icom radio, specifically the sections on wiring, grounding, and safety. Each model has unique specifications, from power requirements to mounting configurations. The manual is your definitive resource, offering detailed diagrams, safety warnings, and step-by-step instructions specific to your device.
Neglecting this step can lead to improper setup, diminished performance, or even damage to the unit. Taking the time to understand the manufacturer's recommendations allows for smooth installation and protects your investment. This foundational knowledge unlocks the full potential of your Icom radio.
Choosing the right spot for your mobile radio inside a vehicle or at a fixed station is necessary for both usability and performance. Place the unit somewhere that’s easily accessible to the operator without obstructing their view or interfering with controls. Also, legally, you can’t block airbags. A well-chosen location prevents accidental damage and allows for easy adjustments while on the move.
High-power Icom radios generate heat during transmission, and proper airflow prevents your radio from overheating. Leave at least two inches of open space around all sides of the radio, especially heat sinks and ventilation grilles. When you install the radio, position it horizontally—unless the manual says otherwise—so that the built-in cooling systems function correctly. Look for a stable, secure surface that minimizes vibrations, which can negatively affect the radio's internal components and generate more heat.

A secure mount is the first step toward a professional, durable installation. The best way to securely hold the radio in place is to use the manufacturer-provided hardware. Your Icom radio likely came with a dedicated mounting bracket designed for a perfect fit. This bracket can handle the radio's weight and withstand the rigors of a mobile environment, from bumpy roads to choppy waters.
If the included bracket doesn't suit your specific installation needs, you can use any third-party solution that’s fully compatible and robust enough for the job. The goal is to create a firm, stable mount that prevents the radio from shifting or becoming a hazard.
For consistent, noise-free performance, connecting your Icom radio's power leads directly to the vehicle's battery is the recommended method. This direct connection bypasses other electronics that can introduce electrical interference, or "noise," into your transmissions. It also guarantees that the radio receives stable voltage and keeps the radio performing at all times.
The design of the power cable provided by Icom fits the radio's specific power draw and includes safety features such as inline fuses. Route the cables carefully, avoiding sharp edges, hot engine components, and moving parts, which could damage the wiring. With proper power management, the results are clear, reliable communication.
The antenna is arguably the most important component in achieving optimal range and clarity. For best results, mount the radio antenna on the highest, most central point of the vehicle, such as the roof. This placement provides an unobstructed 360-degree plane for transmitting and receiving signals, maximizing your communication range.
Proper grounding of the antenna to the vehicle’s metal chassis is extremely important. A solid ground connection keeps the antenna system performing efficiently. When you’re routing the coaxial cable from the antenna to the radio, avoid sharp bends or pinching the cable, as these can degrade the signal and affect performance.

Beyond the antenna, the radio unit itself requires a solid ground connection. Proper grounding dissipates electrical noise and reduces the risk of interference from the vehicle's other systems. This simple step can improve your audio’s clarity.
To achieve a good ground, connect the radio’s ground wire to a clean, unpainted metal surface on the vehicle's frame or chassis. Scrape away any paint or rust for a direct metal-to-metal connection. This small detail makes a big difference in your communication system’s overall performance and reliability.
After completing the installation, test the antenna system using a standing wave ratio (SWR) meter. This device measures how efficiently the Icom radio is transmitting power through the antenna. A low SWR shows that the antenna is radiating most of the signal effectively, while a high SWR means the power is reflecting back into the radio, which can cause poor performance and potentially damage the transmitter.
To use an SWR meter, connect it inline between the radio and antenna using a short coaxial jumper—TX port to the radio, ANT port to the antenna feedline. Turn on the radio, select your intended frequency band, and briefly key the microphone to take a reading. An SWR of 1.5:1 or lower is ideal; up to 2.0:1 is acceptable; and anything above 2.5:1 indicates a problem that needs troubleshooting.
If your SWR reading is too high, there are a few common potential issues to check. Start by inspecting all antenna connections for corrosion and tightness. Examine the coaxial cable for any sharp bends, pinches, or physical damage that could interfere with signal flow. Make sure the antenna base is properly grounded to the vehicle's metal chassis for efficient operation. Also, confirm that your antenna is for the frequency band you're using. If your antenna has an adjustable length or tuning screw, fine-tune it to bring the SWR down to a safer, more efficient level.
Once you connect everything and test it, take the time to neatly organize and secure all wiring. Use zip ties, cable clips, or wire loom to bundle cables together and fasten them away from pedals, moving parts, and high-traffic areas. This prevents cables from becoming snagged, disconnected, or damaged over time. It also gives the installation a finished, professional look and makes future maintenance or troubleshooting much simpler.
A successful Icom mobile radio installation sets the stage for seamless, reliable team communication that enhances safety and productivity. When you use these professional tips for mounting and installing Icom mobile radios, your equipment can perform at its best from the moment you power it on.
If you need expert guidance on selecting the right radio, such as Icom HF mobile radios, or assistance with complex installations, our team is here to help. Contact Atlantic Radio Communications today for unparalleled product knowledge and support for your unique operational needs.


